I need to reconstruct this png in Designer, so I can change it around accordingly.
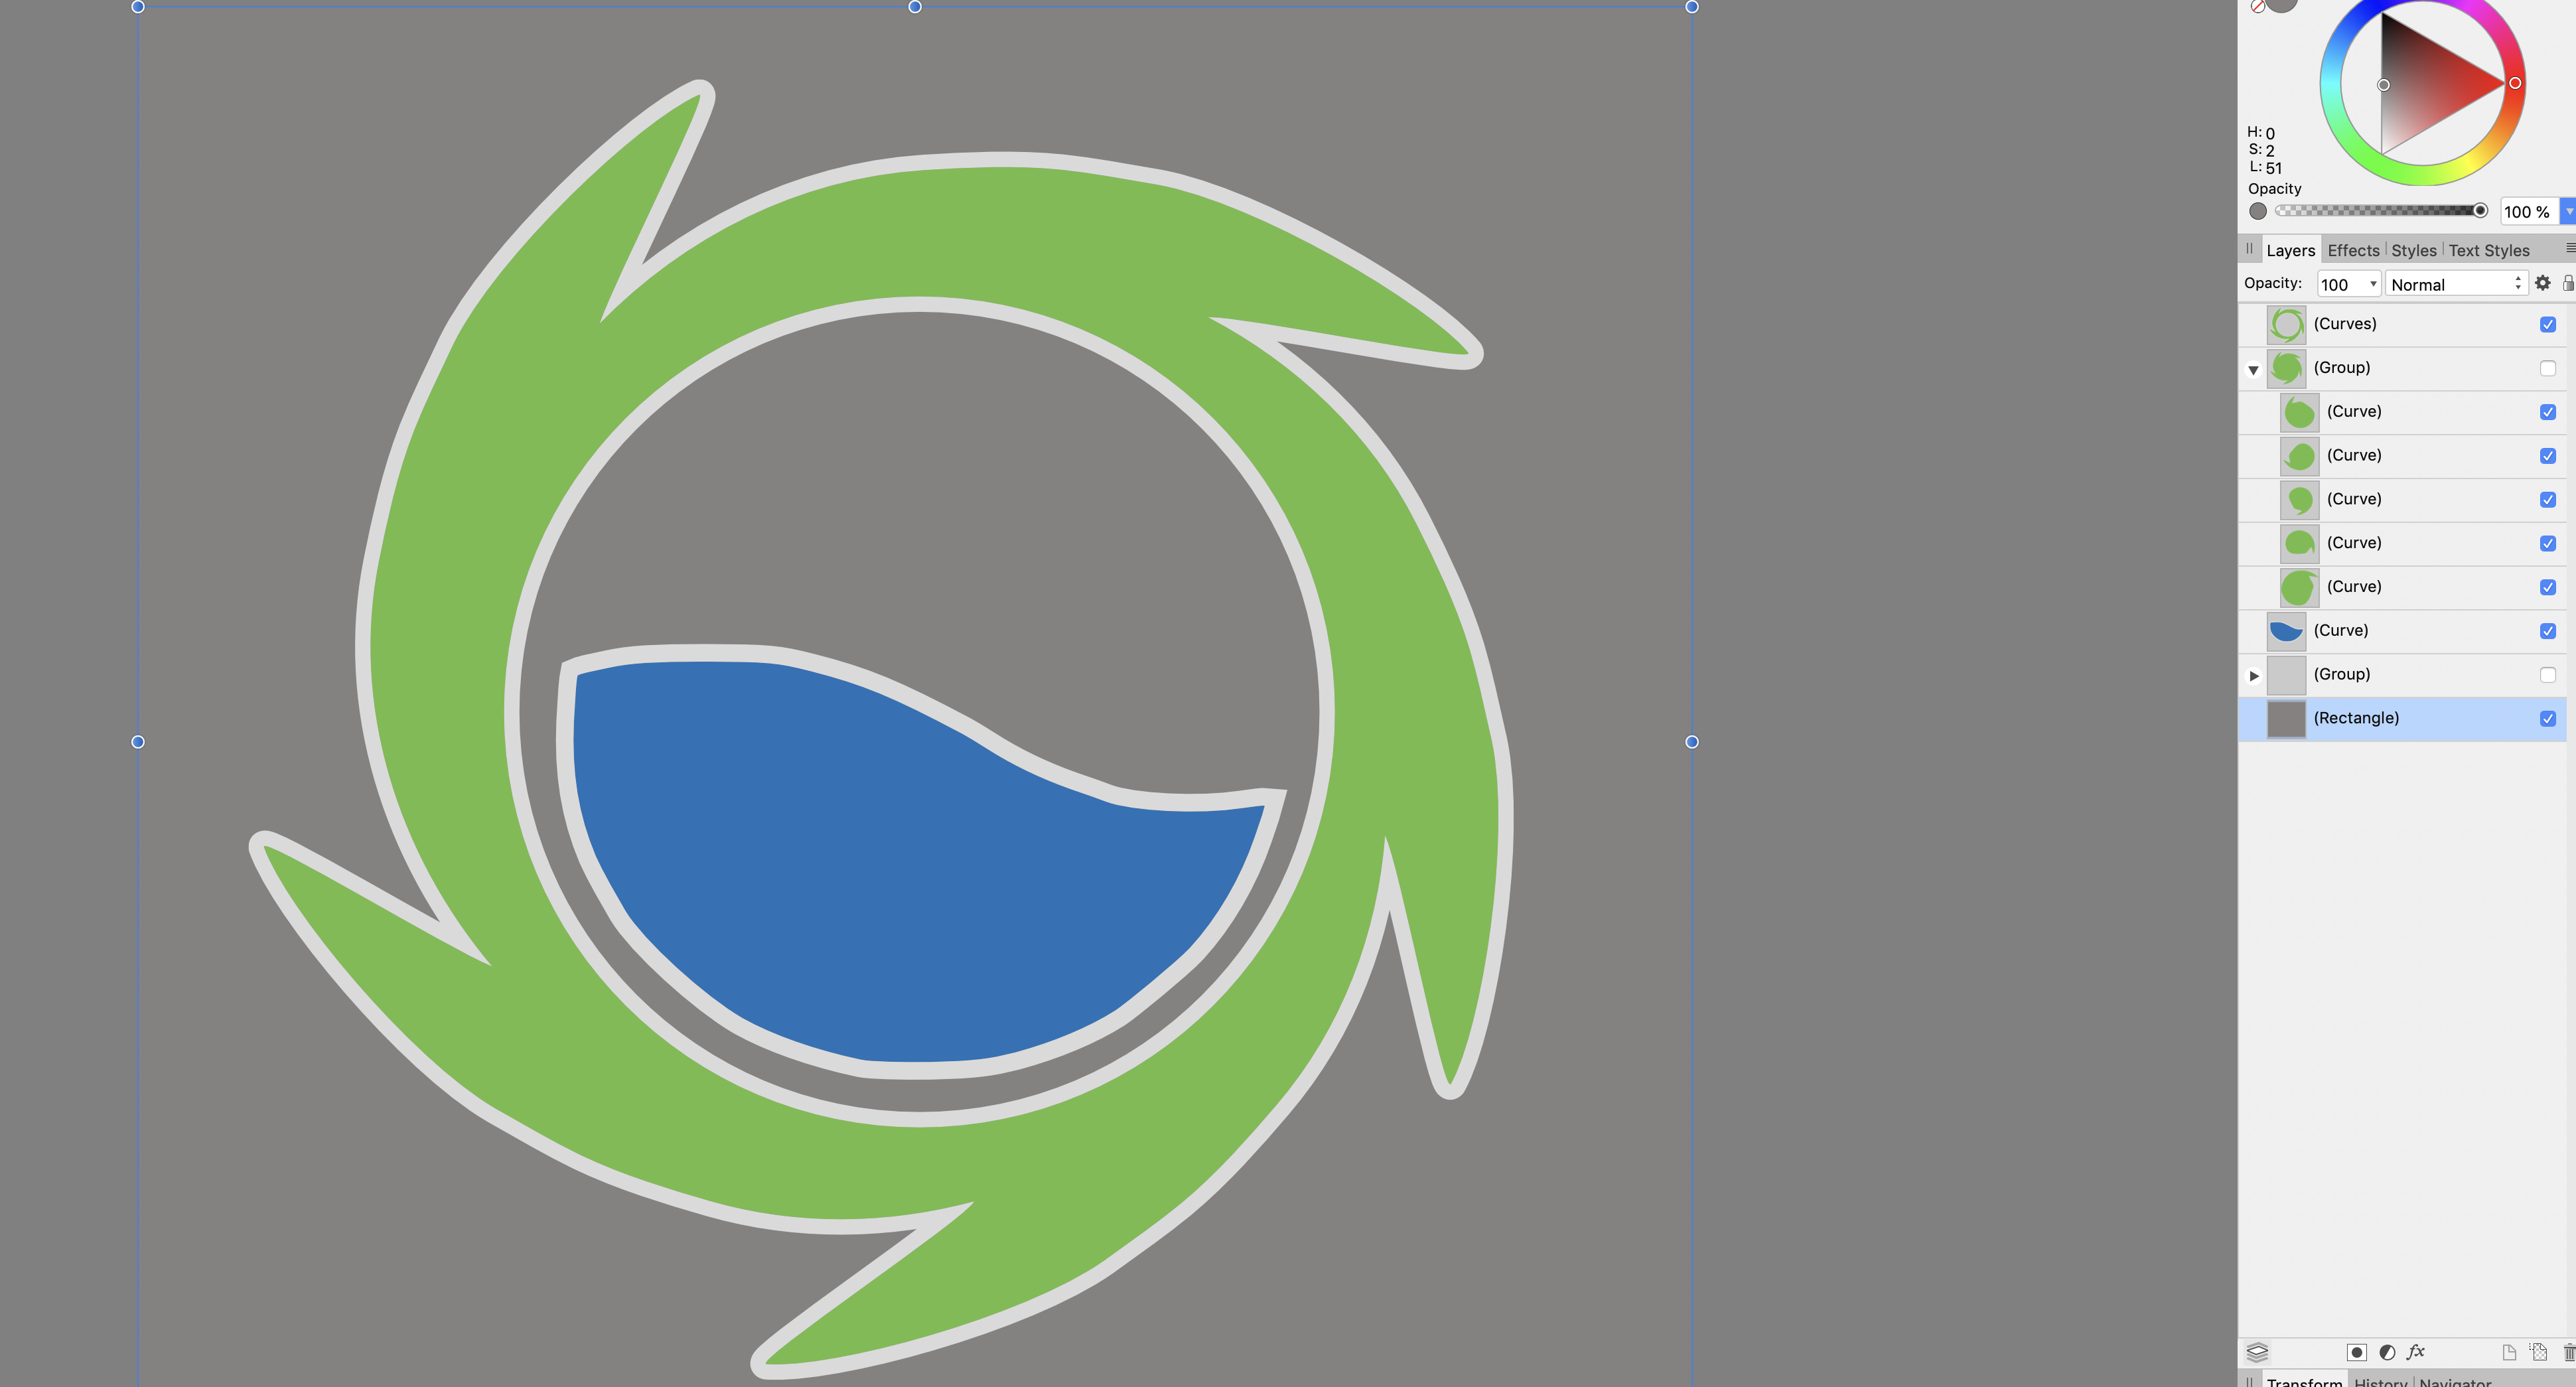
As I see it the logo consists of two layers, the green and the blue bit. These layers have a grey stroke. I just want to replicate the two layers, I won’t be applying the stroke.
I’m getting good with Designer, but this is above my skillset at the mo. Anyone any advice?
That’s a really good Affinity tutorial and perfectly presented.
It is always interesting to see how others approach these tasks and always informative.
I would probably have gone for a solution using circles overlayed onto the original image to get the correct dimensions, and then by a process of subtracting and adding circle shapes, made the outer ring for 1 of the 5 radial ratchets, and then copied and pasted that image an extra 4 times by rotating by 72 degrees for each paste.
Your precise approach puts my quick and dirty solution to shame.
Or I may have checked out my favourite iPad App - Assembly to build it by subtracting and combining using pre defined shapes in much the same way.
I did actually have a go at this the other night. I’m not going to insult people with a video of how I did mine (which I won’t be using on the final site), but this image more or less explains it.
I made one shape, then copied and rotated it. Not unlike the method in the video, but with zero precision!
I grouped these layers and duplicated them, hid one of the groups and merged the layers in the other, then did the subtract thing. When my version gets small it is almost passable, but when it’s enlarged it’s a mess, but for he mock-up it sufficed.
For the inside blue bit, i completely cheated and copied it from the original, it’s just a single layer with some stroke.
Wow - thank you Trond! Your video is fantastic. I watched it once straight through, and will watch it again as I (try to) duplicate what you were doing. I learned quite a bit this morning…so, thank you!