this is just an info, less a problem. I wanted to be lazy and have all ‘header’ images displayed the same size in the Poster (1) list view despite them having different aspect ratio. So my thought was that the Source ‘Image Fit’ with a fixed height would do the trick …
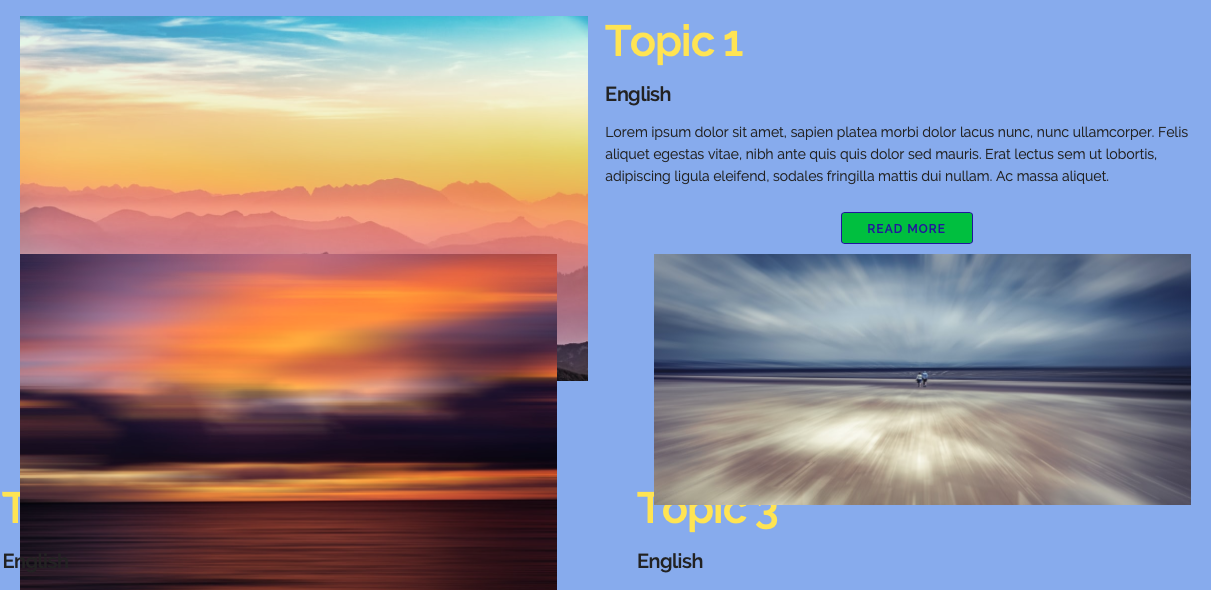
However, I just recently learnt from Jannis that not every stack inside a poster item can be properly displayed (unless its pure HTML). Well, it seems that the ‘Image Fit’ stack doesn’t fit the requirements. Below image shows that the images are displayed ‘not being cropped’ hence overlapping neighbouring content.
To be fair - the much simpler solution is to be a bit more diligent and simply provide the ‘header’ images in the same aspect ratio and everything works right away ;) Hence, this is just a piece of info for you and possibly others, and for complete disclosure I haven’t tried it yet with Poster 2.
I haven’t tried in Poster 1 but I was playing with it in Poster 2 just yesterday and could see that there is some image size overriding going on. Image Fit would be a good solution to get your header images the same size so we will get this to work…
The effect is visible as soon as I try to limit the height of the image within ‘Image Fit’ to a fixed value (here the standard 250 px). I removed the RWML stacks to avoid any complications.
I simply used some ‘Unsplash’ images without any optimisation … sorry for the load.
On a side note: I was playing with showing the header image in the ‘detail view’ as hero banner image using Source Container plus’ background image. It works when taking Poster 1 outside of a standard container. The only issue is, that the title (and possibly other entries under the title) are then no longer bound to the max-width. I presume, one could provide a margin for the title via CSS, or is there possibly any other trick ? Poster 2’s template could possibly be an easy solution here, but I haven’t tried it yet ;)
In fact it can be easily sorted just by hiding the overflow on the image fit item. I’ll add this into the stack but you can add this css in the meantime:
You’re (almost) right - the container stack was used from my attempts to try to get it to work …
… however, there is another reason for it (as long as I don’t use any other CSS snippets again ;): the Image Fit stack doesn’t give me access to set margins/ padding, hence I put it into a container … I presume using your CSS classes might allow me to achieve this within the Image Fit stack, too, but I am just not that advanced ;)
I presume that Poster 2 indeed will give me the total freedom with the templates (however, there might be issues with multilingual pages and the use of RWML … different topic)
In Poster 1, I can use the ‘Poster Hide/Show’ stack to define how I want to have the header image displayed in ‘list view’ and in ‘detail view.’ In order to use the same header image in ‘detail view’ as a hero banner, I am using your ‘Container Plus’ stack with background image and the full width applied to the ‘outer container’. The ‘outer container’ is the Poster stack in this case. Hence, when I put the Poster stack into a normal Source container, it’s width is the base width, and not the full screen width typically used for banner images. I therefore moved the Poster stack out of a Source container, which gives me the correct banner width (see the examples in the link above). However, as a consequence the automatically placed poster item title is then shown all the way at the left screen edge, since no margins/ padding has been automatically applied.